Today, my wife and I spent our anniversary at Greenwood Gardens in Short Hills, for “Plein Air Day” (Tripods welcome). While my wife did some watercolor painting, I took this opportunity to do some long exposure, UV photography.
You read correctly; UV, not IR. I’ve recently begun working on a project to rediscover my world in UV now that I’ve acquired all the necessary “UV Black/Short-pass” filters.
Until today, I’ve been working handheld, which requires an ISO of up to 6400 and sometime push-processing. UV is very difficult to capture even with a converted camera, unlike IR which is abundant even in the shadows. But today I was able to shoot a ISO 100 using long exposure, and with little or no breeze, it was a perfect day for it, and I was able to capture this 81MP 340nm ultraviolet panorama.
Today I decided to pit two mirrorless cameras against one another, a Canon and a Nikon. And the results surprised even me.
The two cameras were the Canon SD780 IS and the Nikon Z 5. A friend just inherited an SD1400, and it reminded me of just how much fun I’ve had with my Canon digital ELPH. Thus it was time to revisit that. Meanwhile, I have not given my NIKKOR Z 40/2 the love it deserves, and so I want to take that out for a spin as well. Two mirrorless cameras, 11 years apart.
Back in the day, I read a flattering article on the SD780 and saw one in a camera store window. I decided it would be great to have to fill that historic niche of being able to say I had a Canon ELPH even if it was a digital one. Thus, it just had to have an optical viewfinder, as did all my cameras. Composing on the LCD neatly solves the long-time parallax issue of the optical viewfinder, but it just wouldn’t have been an ELPH without one.
Preferring to use the OVF as I do, I quickly recalled how to compensate for parallax with this camera. Compose the image, and note what is in the very center. Then move slightly down and to the right. BOOM! When you start up the camera, it defaults to 33mm. So as I start to compose the shot, I nudge the zoom, once for 40mm and a second time for 50mm. After some CHIMPing, I was able to nail the parallax compensation on the first shot. When you zoom in towards 100mm, the correction is less, and you almost don’t have to worry about it at all. I’ve also got my Z5 and naughty forty with me, so I’m levitating towards one nudge so I can compare them. It seems crazy to be using these two cameras in parallel. But I’m betting that for a lot of shots, some folks won’t be able to tell them apart.
I enjoyed both the simplicity of the SD780, and the flexibility of the Z5. I started with the SD780 on the way out, and then switched to the Z 5 on the way back, but then I actually alternated between the two at times. In the studio. I transferred all the images to my workstation, but wanted to work on the Canons first because I was just so amazed at the quality. So I decided to tell this story in two posts beginning with the Canon SD780 IS. Here are some of the images, which have been mildly processed with some highlight recovery and and an exposure compensation of -1/3 stop.
I came across a horseshoe crab as I often do on DHB, and when it moved its tail, I realized it was still alive! So, a rescue was in order. As it turned out, this was the second time it had been rescued today, as my wife, who had gone on ahead of me previously threw it back in. Some crustaceans never learn.
I think I will name him “Barnacle Bill”…
I turned “My Colors” off, essentially setting the color profile to “Standard” as opposed to Vivid or Neutral, which is how I tend to set my DSLRs. I wanted to get a baseline for today’s exercise. After reviewing the images, I have only one complaint, and that is that some of the extreme highlights were not handled so well. I set iContrast (the equivalent of Nikon’s ADL) to auto, but still some of the highlights were blown-out. Not so however, shooting directly into the sun, which the camera handled remarkably well. Next time I’ll have to experiment to find the best exposure—perhaps an exposure compensation of -1 would do the trick.
Canon’s evaluative metering nailed this exposure correctly, and the sun is actually not above the clipping threshold. Nice!
Just as I thought, the car did sustain some more debris acquisition, and I did not bring my pocketknife. The “wall” had actually deteriorated and pushed some reeds its way. I’ll let nature work its magic until next time.
I thought I give 100mm a go on the horizon at the North end of “Bottle Beach”. The first is the bridge we cross over on the way to Barren Island, and the second is Coney Island from a distance. These could make nice panorama crops, and maybe even ACR “Super Resolution” may yield some interesting results. But here I think is where we find the limitations of the 1:2.3″ sensor size of the SD780.
This is what the images look like at 200mm with SR:
So these are the SD780 images. Next, I’ll share the Z 5 images, which of course will all be 40mm. But, 40mm at 24MP instead of 12. So, technically I could make them 60mm images by cropping, and quite possibly get them up to 100mm with Super Resolution with more detail than these. We’ll see.
A photographer friend posed an interesting question the other day; “Have you ever shot any of your Voigts on your [CCD] D50?”. And I couldn’t recall if I did.
So today’s trip to DHB will be “D50-Day” with the Voigt 28. Or, it could even be “CCD-Day”. And as is the usual practice, I brought a second lens with me…an 18-55mm f/3.5-5 kit zoom.
My D50’s claim to fame used to be that it was an IR capable camera and while that’s still true, today I think of it more as my CMOS alternative. CCD sensors are known for their low noise and perhaps also for their different rendering characteristics. They’re also known for their high power consumption, but given that I snapped 360 images and the battery charge indicator didn’t budge, I’m thinking that’s less of an issue.
In 2005, autofocus and digital went hand-in-hand. No one considered that someone would want to have a manual-focus experience with a DX DSLR. Sure, you can mount an AI or AI-S lens to a DX DSLR and use the sunny-16 rule with the histogram, but it seems a waste to have all those AE modes and not be able to use them. Some FX DSLRs had the ability to index manual focus lenses, but the only way to index a DX DSLR was to employ a “CPU” (chip) with an electronic coupling. And if you include this chip on a manual focus lens, you have a true manual focus lens with which you can meter and use all the exposure modes on a DX camera. Such lenses are known as AI-P, part of the AI/AI-S family.
Enter the Voigtländer Color-Skopar 28mm f/2.8 SL-II. It’s an all-metal, AI-P pancake lens with a sublime manual focus action. On a DX camera, it has a “true normal” focal length of 42mm and it brings a classic MF SLR experience to a DX DSLR.
I love this setup on my D90 and D3100, and on the D50 it brings me back to 2005 and digital photography’s CCD roots. The color rendering is amazing on this camera, and I attribute that to its CCD sensor with just over 11 stops of dynamic range at ISO 200. It tops out at 1600 and unlike many CMOS cameras it’s completely usable at its highest ISO. In fact it’s clean enough to push a stop if you need to.
This kit slows me down—and that’s a good thing—making me work more thoughtfully with composition and focus. The 3000 pixel wide image is my standard for output and the D50’s 3008 px horizontal resolution is just the ticket so long as cropping is not required. Not equipped with grid lines, I found myself using the focus area indicators to ensure the horizon is level so as not to have to crop in post. Like my D90, the LCD is a little on the blue side, so I only use it for composition and to check the single composite histogram. And that’s all I need.
I shoot mostly FX these days, but I got used to the smaller viewfinder of DX very quickly. I found using the matte screen for fast focus and the central focus point with the single focus indicator very easy. The eyepoint is good, and I like the D50’s OEM eyecup design. There’s a lot to like about this camera; it has some nice features like auto-bracketing and support for AF lenses. And I appreciate the top LCD more on this camera since the back LCD does not show shooting preferences.
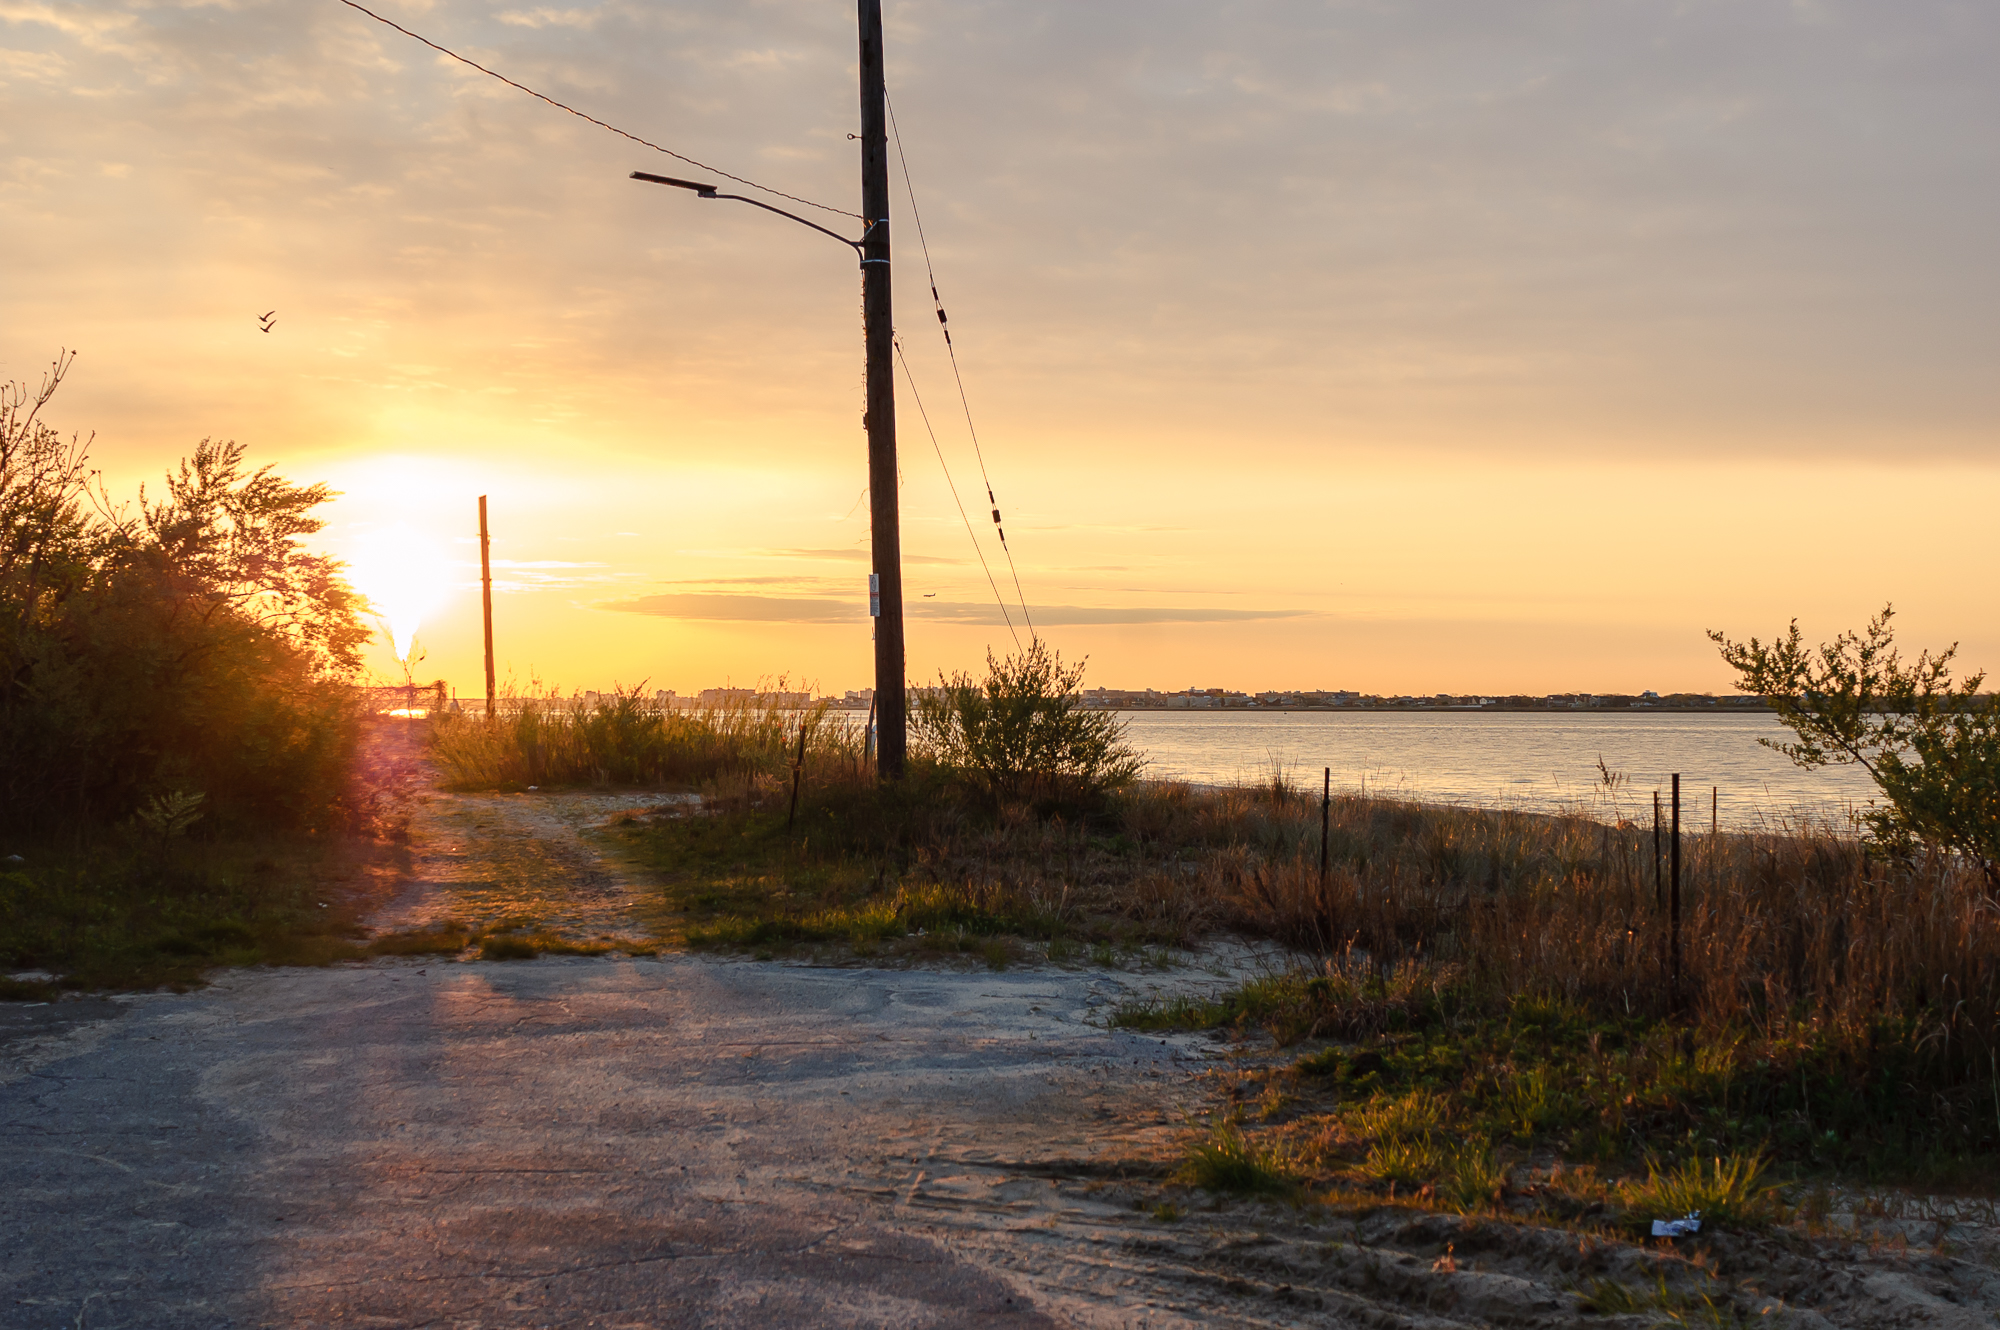
Today was an opportunity to see Barren Island from a whole new perspective. They recently cut back the indigenous beach grasses, and we are entering from the fishing beach to the east.
Barren Island Fishing Beach, Brooklyn, NY
This was the first thing I saw as I approached the beach entrance. I took a shot and found by how dark it was that the metering was set for center weighted average, so I quickly experimented with exposure compensation. As it turned out, this underexposed version was my favorite shot. I rescued it by opening up the shadows in camera raw and increasing the exposure by half a stop. This is probably darker than what I actually saw, but captures the mood better. I could have recovered a lot more detail around the sun, but it wasn’t flattering.
Once I got the exposure compensation figured out, this is what I captured, which is very close to what I actually saw. I was able to judge the exposure by the preview image on the 2″ LCD and by the histogram, and as I look at it now it’s quite close to the preview in camera raw. I wouldn’t rely on it for color though.
Gil Hodges Memorial Bridge – Eastern Side
Here’s my first view of the Gil Hodges Memorial Bridge from the east. These were all daylight white balance. Auto white balance yielded a warmer image which was also nice, but I thought this brought out a greater diversity of color. I was able to make that decision based on the relative color of the previews on the rear LCD, so it is useful in that respect. I tried adjusting the white balance in Camera Raw, but the Daylight setting was way off, yielding a very magenta image. On the other hand, Nikon’s NX Studio was spot on. When I have time, I’ll use Adobe DNG editor to fix all the D50’s camera profiles to match the JPEGs. I can’t say enough good things about NX Studio.
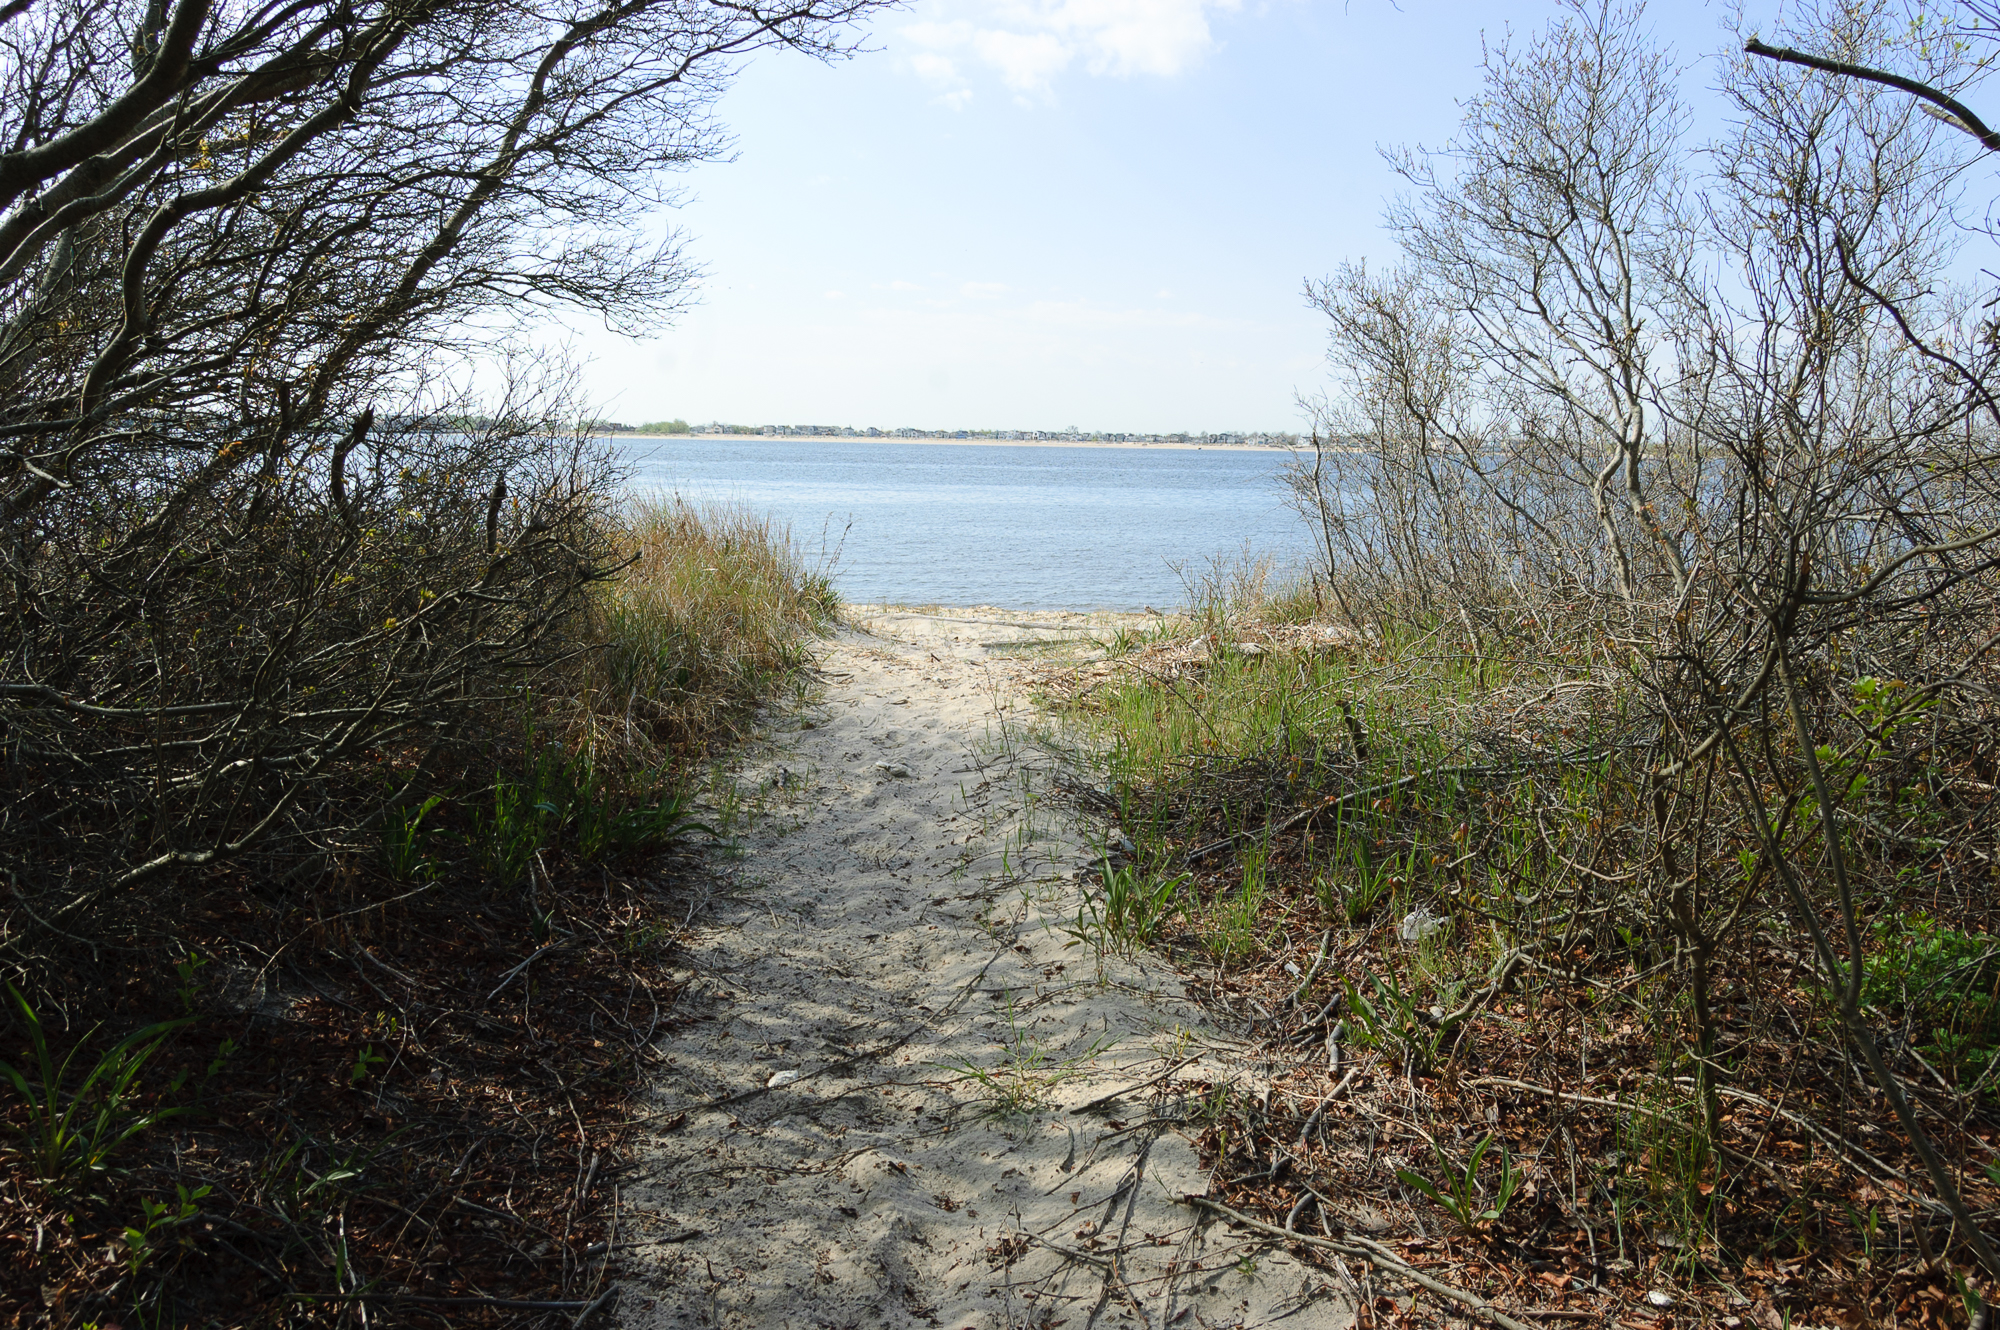
Fishing Beach Facing East
Barren Island fishing beach facing east. From this angle, it looks like any other beach, and could be quite nice in the warmer months and possibly less populated than more popular beaches. I definitely want to explore this further eastward this summer. By this time I settled on Matrix metering to see if it would improve shots taken directly into the sun, and auto white balance because I find that generally works well when the light source does not fit neatly into a situation like daylight, tungsten, cloudy or shade. Sadly there are no “Golden Light” or “Blue Hour” WB settings. Figuring out what the correct color temperature actually is for these looks like a future project. I created a preset in ACR to match the Daylight white balance of the D50 and AWB nailed it, so I will continue to use that for the time being. The exposure is now spot on.
Day for night – underexposed by a stop
I decided to underexpose by a stop to test ISO invariance, and came up with this dramatic version. I then tried opening it up to match the previous, and was quite successful; only a tiny and correctable color shift (and the jury’s still out on whether that’s worthwhile) so digital push processing is definitely viable on this camera. A little noisier, yes, but then so would film be. I love the extra detail in the sky in this shot. One of the niceties of the D50 is auto bracketing for both exposure and WB, so it would be easy to create different versions based on exposure.
Looking west, towards DHB
I was not crazy about this shot in AWB, so I applied the new Daylight WB preset that I just created and it worked out great. I used the LAB color mode with ACR to match it exactly, a trick I show in one of my ACR training classes. Using LAB allows you to match color precisely between shots without having to worry about exposure.
Continuing westward to my usual haunt, these are some of the randoms I shot…
The only processing I did on these was to remove chromatic aberration and apply the lens profile for the Voigtländer Color Skopar 28mm f/2.8 SL-II. I can’t wait to work the color on those textures for some abstract work. Incidentally, the last time I was fiddling with the settings on this camera, I set the “Picture Control” (they didn’t call it that back in 2005) to Vivid. So all the JPEGs are in that space. (All the images posted here came from the RAW versions). I was annoyed at myself for not checking that, but in retrospect I like they way they turned out. I think of the Vivid camera profile as a kind of Kodachrome or Kodak Ektar film simulation.
Now, onto more familiar scenes…
I’m going to name this area “Dead Horse Cemetery” as the pilings resemble gravestones. Here they seem very colorful compared to some previous shots I’ve taken of this same scene. Again, the color on the D50 never lets me down.
In pondering the question, “is 6MP enough resolution?”, I decided to do a test as I processed the next image…
Native 6MP image
I applied Adobe Camera Raw’s “Super Resolution” to create a 24MP of this image, then resampled it back down to the crop I wanted…
24MP image generated using Super Resolution and recropped
I got my answer. If I ever did need a tighter crop, Super Resolution would allow me to avoid pixelation and restore detail. I can achieve double the focal length of any lens this way with very little loss of quality. So 6MP is not a restriction.
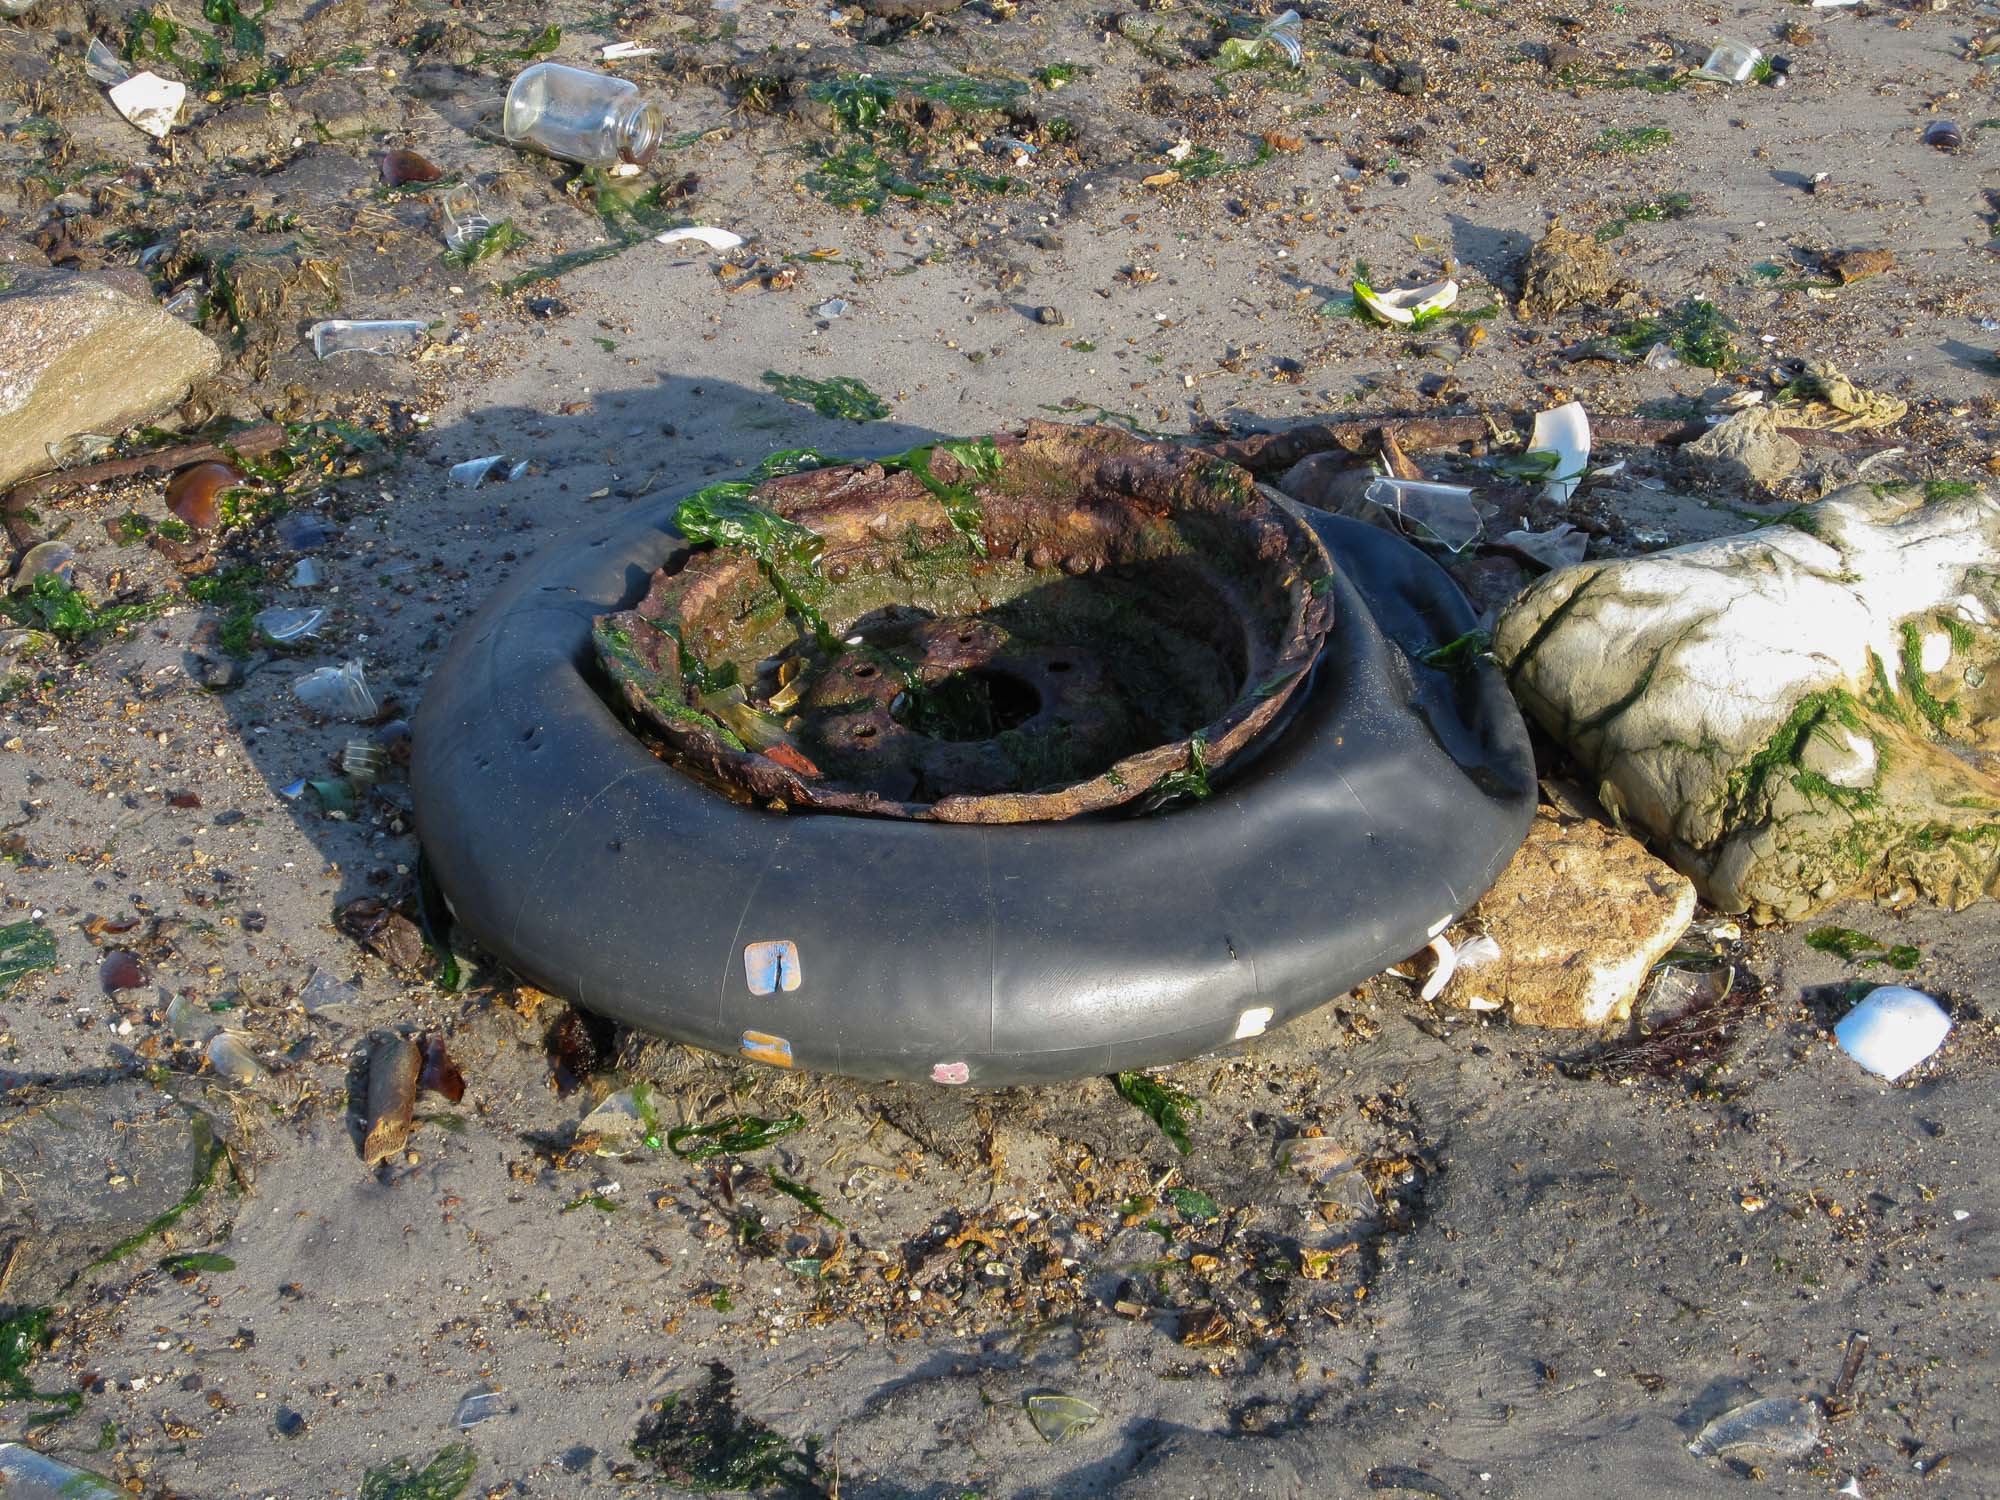
I continued along the beach westward and around the hook as far as “the truck” and made an executive decision to liberate it from the vines and other detritus to make for a better series of pictures. It’s not about the equipment we have, but how we make the most of it.
This was very exciting. I was actually able to identify the engine as a straight-8. Who knows if it will be this clean the next time I visit, but I’m going to bring a utility knife and some other tools with me to finish the job. This is going to be a new project.
Then I decided it’s time to swap out the lens.
A while ago I was reorganizing my photo boxes, and I came across a D50 kit box. I’m not quite sure how I came about this. (I believe I saw it in a store window and when I inquired about the camera the owner gave it to me because he already sold the camera.) With it, I was easily able to identify the kit lens the D50 shipped with. So I went on a quest to find one, which I did. Fifty bucks, like new, eBay. I didn’t need it, but I couldn’t seem to pass it up.
With a range of 27-82mm, and a very close focus, this lens in incredible versatile. You can actually see the windings of the ignition coil in the third image above. In the process of detangling, I broke the otherwise in tact rubber fan belt, which pissed me off. I put the ends together and next time I’ll bring some superglue to glue them together. It’s the least I can do.
Turns out, I’m quite smitten with this c2005 G lens. The action of the zoom ring is very satisfying…it feels a lot like the focus ring of a manual focus lens. And it has a nice shape minus the weird bulge of its 2007, VR-enabled successor. Oddly, it has a matte finish instead of the usual speckled finish, and a smallish ID plate. The manual focus travel is extremely short (about 45°) but it’s decidedly unsticky and so it’s easy to make minute adjustments. The front barrel rotates with focus, so when the HB-45 snap on lens hood I have on order arrives, I can just grab that to focus.
On the way back I headed down some of the familiar trails which no longer looked as familiar due to the clearing…
It was suddenly quite an interesting landscape. I got lost a little along the way as the path blended in the newly cleared areas. But I found it again and headed back to the beach using a different path…
…this path was familiar, but now with a slight twist.
I like this new DHB and newly discovered territory to explore. But what I really enjoyed was getting to know my D50 a little better as a CCD shooter and seeing what it can do with this new lens and with an old favorite. The AF-S DX Zoom-NIKKOR 18-55mm f/3.5-5.6 ED will remain on the camera when I stow it, though there are so many other lens options in my ket that I can use, including these Voigtländer AI-P lenses that turn it into a manual focus champion. But from a historical perspective, it also feels good to shoot it with its native lens.
I’ve begun a new series —Wabi Sabi—and I decided to see how this would fare with the NJFCC judges in our monthly club competition. Let’s see how that goes…
Do NJFCC Judges understand Wabi Sabi? I recently learned of this genre thanks to a presentation by one of our club members. Laura Russamano. I’ve actually been doing it unconsciously for decades without knowing what it’s called. To me, it’s a variation on “Vernacular” photography in having an affinity for certain everyday objects and appreciating their intrinsic beauty. But Wabi Sabi also celebrates the “transience and imperfection” within them. Wikipedia defines Wabi Sabi as…
“In traditional Japanese aesthetics, wabi-sabi is a world view centered on the acceptance of transience and imperfection. The aesthetic is sometimes described as one of appreciating beauty that is “imperfect, impermanent, and incomplete” in nature. It is prevalent in many forms of Japanese art.”
After my wife’s recent watercolor workshop in which she featured our home-grown daffodils as the subject, they have drifted onto my radar screen. We grow several varieties in our garden including our mutual favorite, the Fortissimo. After the workshop, they began to wilt, and I observed how beautiful they are even in their decaying state. They retain some of their original color while taking on new textures. I often miss the flowers when they peak and then avoid photographing them altogether. But Wabi Sabil thinking present a whole new set of opportunities. So I give you…Wabi Sabi Daffodils.
Wabi Sabi Daffodils
My professional work always leads to experimentation, so this month’s competition becomes an experiment to gauge the understanding of this popular photographic genre amongst the NJFCC illuminati.
Here are my other submissions, some of which I had queue up, and one of which I re-edited…
On the left is an old favorite from a 2012 trip to Boothbay Harbor in Main. Upper right is a healthy and vibrant “Fortissimo” daffodil, also growing in our garden. Lower right it an architectural shot from the Tower of London, c2010.
I shot the two daffodil photos with one of my favorite kits, the Nikon D3100 and Voigtländer Color-Skopar 28mm f/2.8 SL-II. It’s an AI-P type lens that turns the D3100 DX DSLR into a 45mm manual focus champion. I was pleased with the depth of field vs the bokeh, and I plan to use this setup for some street work in the near future. I particularly like the 40-45mm focal length range for street.
The irony of having all these collectible cameras, many of which are working SLRs, is that not one of them has been a Nikon. Until now.
Nikon F3 HP. Professional 135 SLR with High-Eyepoint Viewfinder.
When a colleague of mine learned of my obsession, he told me about some items he was looking to sell, and the Nikon F3 was a bargain I just couldn’t pass up.
In choosing what would be my favorite Nikon manual focus SLR, I had finally nailed it down to an FE, or FE2, which had just the right combination of technology, classic all-metal construction, and good industrial design. These were to be the cameras to watch for. At the time these cameras were available, I was in the Canon camp, so it took some research to fully familiarize myself with the Nikon Line. Then along comes this F3.
The F3 is a professional camera. It’s two years newer than the FE, which is considered a “semi-professional” body. The F3 takes on a slightly different character with its Guigaro styling (the first of many, including current Nikon SLRs) and slightly different control placement. There is also slightly more plastic, but not in any areas that affect performance or durability. It’s one solid camera, highly advanced, and yet traditional enough to give you that classic manual-focus SLR feel.
The F3 is full-featured and incredibly smooth operating. This particular model (the HP or “High Eyepoint” version) features a wonderfully clear, full-information viewfinder. The use of a digital LCD shutter speed/exposure readout was highly advanced for its time, although not quite as chic and imminently usable as the match-needle system of the FE. However both the F3 and FE feature Nikon’s elegantly simple aperture readout via a second set of aperture numbers engraved right on the lens itself. In manual mode, you adjust the exposure until -+ appears just to the left of the shutter speed, above the “M” which indicates manual mode.
Being an electronic-shutter camera, the control layout is a little different from the traditional mechanical shutter SLR. Concentric with the rewind crank is the ISO and exposure compensation dial. Finally, there is a means to adjust exposure plus or minus up to two stops, just like modern DSLRs and other digital cameras. The shutter speed dial is in the traditional location, but lacks the mechanical means of setting the ISO by pulling up and turning. So far, all of this is pretty much standard for electronic shutter models. However the F3 attempts to simplify things by combining the shutter release, film advance lever, and power switch into one concentric assembly. This design harkens back to the Minolta SR-T series, which I tend to use as a benchmark of SLR design since it was the camera I learned on. My first serious camera, the Canon AE-1, took a similar approach by combining the film advance lever with the shutter speed dial, keeping the shutter release separate. Either design helps to cut down on the clutter.
User Interface: A clean top deck.
Another nice logical control placement is the self-timer, a lever concentric with the shutter speed dial. The depth-of-field preview and mirror lock-up (Yay! Finally!) are combined into one pushbutton/lever unit on the front of the body to the right of the lens. Below this is the AE lock button (again, Yay!) combined with another nice feature; a mechanical 1/60 second shutter release. This, just in case the batteries die, which is unlikely to happen due to the incredibly low drain of the LCD. It’s also unlikely that you won’t be able to find batteries for this camera, as it uses two A76 batteries, probably the most common button battery.
Being a professional camera, The finder assembly is removable, allowing you to swap out focus screens (much more easily than today’s DSLRs by the way) and features a built-in eyepiece shutter for time exposures.
So how does the camera feel in my hands compared to all the others I’ve used? Wonderful.
It’s not quite as heavy as my old Canon F1 (928g or 32.7 oz as opposed to the F1’s 1070g or 38.0 oz) but certainly as robust. All the controls are easy to access, although the concentric self-timer and power switch levers are quite stiff; no fingertip operation here. But, then it’s not necessary to turn the camera off to preserve battery life, as they are only activated momentarily with the shutter release is pressed halfway.
Like any professional camera, its weight is an asset promoting stability. But fatigue is abated by the implementation of a slight grip on the right side. Enough to lessen necessary grip pressure, but not too much as to be cumbersome as in modern “motor drive” style grips. (This is where the F4 makes a major departure from traditional design.)
The only downside that I can see is a rather low maximum flash-sync speed of 1/90 sec. This is because the F3 employs a titanium horizontal focal-place shutter, as opposed to the FE’s titanium vertical shutter. Still, the F3’s top speed is 1/2000 sec., no slouch compared with the FE’s 1/1000 sec. and much more reliable. The FE2 does improve upon this however with a blinding 1/4000 sec. top speed. I have yet to learn if modern FP flash technology can overcome this barrier.
So, my quest is sort of over. I think I’ve found my new favorite manual-focus Nikon body. And with full metering access to all but my G-series NIKKOR lenses, It’ll get plenty of use. There may still be an FE or FE2 in my future, but for now, the F3 is a daily shooter that happily fills the gap.
This morning I picked up my film from CVS. For less than a Grande Pike’s Place blend at Starbucks, I have color processing, in as little as an hour if I needed it. $2.34 to be exact. No crappy 4×6 prints, no lo-res scans on CD-R.
I also opted not to have the negatives cut. With all this high-volume, automated processing, they often come back miscut. Plus, they put them in cheapo sleeves that I have to throw out anyway. Instead, they deliver the negatives rolled-up in a recycled film container. That’s fine with me.
So, does the Konica IIIA work? Well, every frame came out. Negative densities look good. I’m on my way out to a gig, so, I sleeved them to relax the curl and tomorrow I’ll loupe and scan them. I did an initial scan of one frame shot indoors, wide open, and aside from a little motion blur, it looks pretty good.
The Epson V500 can scan up to 12 frames in a batch, if your negs are cut in strips of six frames each. Four is the norm, so it takes three scanning sessions to complete a full roll. You prescan them, check off the boxes of the frames you want scanned, select each thumbnail to set the exposure and resolution preferences, click scan, and go get a cup of coffee. If you have the Digital Ice feature turned on to filter out dust and scratches (and it’s well worth it in the long run) it takes a while, but at least you can go do something else while it’s doing all the work.
Scanning a “contact sheet” is much quicker. You can turn off Digital Ice and use a lower resolution. Later, you can rescan the “gems” at a higher res, and any adjustments you applied in Camera Raw can be transferred to the higher-resolution file.
Before I judge too harshly the sharpness of the IIIA’s lens or the accuracy of its focus, I’ll need to keep the film as flat as possible. This may mean modifying or replacing the V500’s negative carrier, which allows the film to curl. Every little problem is amplified with 135 film, which is much smaller than 120.
So far 1/250, 1/100, 1/50 and 1/25 seem to work fine. The next step is to check the really slow shutter speeds, and make sure the flash syncs up. If everything checks out, this will be that real rangefinder experience I’ve been looking for. At least until that bargain Leica M4 come along.
Anticipating how your photographs will turn out is an experience missing from digital photography. More often than not, that wait-and-see aspect generates a feeling of excitement. And right now, I’m excited about my first roll from the Konica IIIA.
Everything seems to work fine. The film loads easily, shutter trips without sticking, aperture adjusts, transport is smooth. Setting the exposure with either the Light Meter App on the iPhone or the Gossen DigiSix was quite easy. All that remains to be seen is if the exposure and/or shutter timing is correct. And I will know that tomorrow morning.
The DigiSix fits nicely atop the camera seated in the cold shoe. So does a Nikon SB-28X Speedlight, but alas I do not have a PC male to male sync cord. Heck, I don’t even have a strap, which is really making me nervous. So if everything comes out fine, I see some necessaries in my future.
The camera didn’t have strap rings, so I need to order a few spares along with a strap. B+W still makes filters in the required 35.5mm threads, and a short PC sync cord will allow me to shoot in auto flash mode.
But the camera handles fine, and is a pleasure to shoot with.
Photoshop 13 (part of the Adobe CS6 creative suite) is now shipping, and its drastically new interface is sure to ruffle a few feathers.
Following in the footsteps of photographer’s tools such as Apple’s Aperture, Capture One and Adobe’s own Lightroom, Photoshop 13 has adopted the serious and foreboding “dark grey” interface.
There are actually four grey color schemes, one darker and two lighter than the default. The lightest restores Photoshop to its more traditional look. Bridge shares these same color schemes, so you can easily keep them in sync. And Illustrator has adopted them too.
Also, the floating “panels” have been combined into one unified window with a solid backdrop which Adobe calls an “Application Frame”. This was actually first implemented in Photoshop 12 (CS4), but is now turned on by default. It can however be disabled, fully restoring Photoshop CS6 to its CS5 look and feel.
In CS4, Adobe changed the tab fonts to uppercase. It was a “change for the sake of change” which took up more space and made the tabs harder to read. However in this version it has been “fixed” by reverting back to upper and lower case.
Those of you who live and die by Camera Raw are in for a bit of a shock. Recovery and Fill Light are gone, replaced by “Highlights” and “Shadows”. Brightness has also been removed and replaced by “Whites”. All of these are now bi-directional sliders meaning that negative values are possible. The good news is that settings previously made in Camera Raw 6.x show up with the previous interface’s sliders. In fact, you can set the RAW 6.x sliders to their default values and save them as a preset so you can still use the Recovery, Fill Light, and Brightness sliders in ACR 7 if you want to. However you cannot have both the sliders from ACR 6 and ACR 7 at the same time.
This new approach seems more logical. Exposure and Brightness may seem redundant to many, despite their use of different algorithms. And it’s not unreasonable to want to lighten the highlights or darken the shadows, the opposite of recovery and fill light. To compensate for the loss of the Brightness slider, Adobe has given the Exposure slider a five-stop range instead of four.
Photoshop’s interface has been much improved by separating the adjustments and properties into two separate windows. Now, when you double-click an adjustment layer, the properties panels pops up like a dialog box, and goes away when you click on something else if you have “hide iconic panels” checked in interface preferences. This is great for saving valuable screen real estate.
At first glance, Bridge remains relatively unchanged. They did change the interface slightly by eliminating the alternate light/dark rows in the Metadata panel. This reduces the readability somewhat, but it comes at the welcome expense of fixing an annoying problem. Previously when you clicked on a single field, all the fields became active which was very distracting. Now, only the field you click on is highlighted. Happily, the alternating light/dark rows remain in the Keywords and Filter panel.
There are lots of other features to explore, which we’ll roll out as time progresses. And only time will tell if the many bugs in CS5 have been resolved. But so far, this looks like one of the more noteworthy releases of Photoshop.
It was never a cognitive decision to become a collector of cameras. It just sort of happened. After acquiring about five collectible pieces, of which I have no idea as to how I came about them, it seemed to be a logical outlet to my fascination with these precision little devices.
I then came to realize that if I’m going to have a collection, it should have certain pieces in it; that is, it should contain a reasonable variety of cameras from different periods, of different designs, with different purposes. This summer’s acquisitions, which were intentional, helped to fill the rangefinder void, and even provide some new shooters. I’m quite excited about the prospect of shooting some 6x9s with the Kodak Brownie Bull’s-Eye.
The ongoing process of building a virtual collection comprised of downloaded and painstakingly groomed images has kept me aware of what to look for. Still, I had no idea that the Bull’s-Eye even existed. Now, I feel as if I should get a second example to modify, Holga-style.
Until now, these cameras have been tucked away in cardboard boxes, taken out from time to time to float around, only to return to their corrugated cells. But now that it’s official, I’ve decided to give them a real home.
IKEA sells an inexpensive ($65.00!) mostly-glass display case which is perfect for collectors. Its IKEA name is Detolf, and it measures approximately 16″ x 14″ x 64″. It has four fixed shelves which can easily accommodate four cameras each, and up to nine if you get creative. I decided to place my cameras on graduated risers, three across by three deep.
The design of the case seems to have evolved over the years, and it now features frosted plastic channels along the back corners to join the glass and keep out dust. The narrow gap at the front could easily be sealed with foam weatherstrip if need be.
Although many of these gems still work, it’s nice to be able to appreciate them as the mechanical marvels they still are in the digital world of today.
Shot the same way as the on-location Brownie Hawkeye. Just for comparison.
Hawkeye’s Bigger Brother: The Brownie Bull’s-Eye
Well, almost. The lighting was not as good, so I slid the subject further back and rested the camera on the edge of the table for more stability. It came out tack-sharp. The warmer surroundings made for a warmer picture. If you turn the camera upside down, you can get within 1/2″ of the surface. Just be sure not to press the sleep button. You can use a coin if necessary.